Time to implement: ~ 1 hour.
Note: Staticman has been disabled on this site.
Evaluating services
When I was to add a comments section to this site, which is developed using Gatsby, I evaluated an array of services.
The most obvious choice for adding comments to a blog would be to use services such as Disqus or Facebook comments since they're more or less plug-n-play. However, both these services have two major drawbacks:
- Client-side rendered comments.
- Privacy concerns.
Since the static-site generation provided by Gatsby have SEO benefits, it would be great to have my comments included in the static-site generation rather than being loaded by the client.
As of this, I narrowed down on options that would enable me to have the comments during the static-site generation. Moving forward, the three options I considered were: Netlify Forms, Staticman or developing my own comments service.
Why I decided to use Staticman
As I rather not reinvent the wheel in order to provide comments on my site, I decided against developing my own service, even though it might be an enjoyable experience.
Digging deeper into Netlify forms, it offers a sweet developer experience, and it just works out of the box (like most Netlify services). However, the free tier of Netlify forms is limited to 100 submissions per month. Even though I'm lightyears away from reaching that limit today (2020-06-19), it's somewhat of a downer. I rather not have to change the integration of the comments section if my site becomes exponentially more popular (paying \$19/month, which is the next tier, for comments, seems unnecessary).
I gladly dove deeper into Staticman, evaluating if it would suit my needs better than Netlify forms. And with a smile on my face, I realised that it did!
- It has no limitations.
- It's open-source.
- It's self-hosted.
- It adds the comments to your Github repository.
Furthermore, it also has support for Akismet, which would be very useful if spammers decide to pick a fight with me.
How Staticman works
Wrapping my head around how Staticman works, I was initially quite confused, as I didn't find it clear if the configuration should be hosted on the frontend or the backend. Let me present you with my understanding of Staticman works, and hopefully, it will clear things up for you as well!
When you submit a comment on my site (running Staticman), the following happens:
- A
POSTrequest will be sent to my Staticman server on Heroku. - The server will check my frontend repository root directory for a
staticman.ymlconfiguration file, and use that configuration file to decide if the request isvalid, and if what actions to take next. - If the request is valid it creates a PR (since I have
moderationactivated, you can also choose to commit directly to your branch) to my frontend repository that adds the comment as aymlfile inside of_data/comments. - All comments from the
_data/commentsfolder are fetched duringgatsby build, and added to the corresponding page.
All you need to do for the Staticman server to run properly is to add a GITHUB_TOKEN, which gives the server access to commit and create pull requests to your frontend repository, and to add a RSA_PRIVATE_KEY to encrypt sensitive data.
The public staticmanapp
Before we move on to hosting Staticman ourselves, let's discuss the public staticmanapp that is described in the staticman docs.
In the getting started documentation, step-by-step instructions on how to integrate with the public staticmanapp Github account are presented.
When doing so, you might have received the staticmanapp isn’t a GitHub member message.
You're receiving it because the public staticmanapp doesn't exist any longer. It was hitting the API limits and people were posting obscene content and it, consequently, was taken down.
As of this, we are self-hosting our Staticman server and using our own Github bot.
How to setup Staticman
There are a few steps required to get Staticman up and running on your website. Let's walk them through one by one.
Create your Staticman bot
To commit new comments or create new pull requests to your frontend repository, Staticman needs access to that repository using a Github access token.
You can either choose to let the Staticman server use your personal Github account, or you can create a new Github account (mine is named oalsing-bot), which you use for these kinds of actions. I strongly advise you to create a separate account to have all automated actions outside of your regular account.
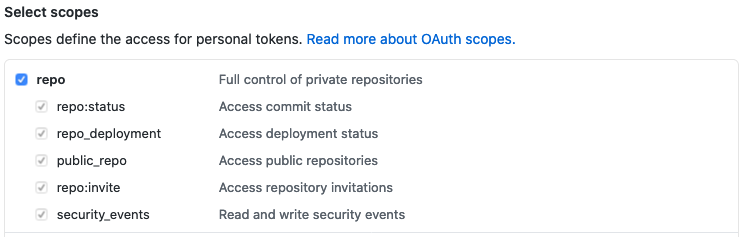
When you've created your new account, you need to generate a personal access token that has full control of your private repositories.
When you've generated the token, save it somewhere. We will soon use it.
Steps:
- Create a new Github account that will serve as your Staticman bot (for example,
oalsing-bot). - Generate a personal access that has full control of your private repositories.
- Save the personal access token, it will soon be used.
Deploy Staticman to Heroku
Now, it's time to fire up an instance of Staticman on your Heroku account. I'm using a free dyno for my Staticman server, so the free tier will most probably be fine for you as well.
Deploying a Staticman server to Heroku is easy! All you need to do is to press the "Deploy to Heroku" button found in the Staticman README, and an application running Staticman will be created for you. You can also fork the repository and add a Procfile yourself, and deploy it to Heroku.
You should now have a Staticman server up and running on Heroku. To finalise the server configuration, we need to add two environment variables.
First, the personal access token you generated in the previous section needs to be added as an environment variable named GITHUB_TOKEN. To do so in Heroku, you navigate to settings -> reveal config vars inside of your Staticman project. You should now a form where you can add the environment variable.
The second variable you need to add is it RSA_PRIVATE_KEY. To do so, you first need to generate an RSA private key. On my Mac, I had to do the following to generate my public/private RSA key pair.
ssh-keygen -t rsa -m pem
Which creates an id_rsa file located at ~/.ssh/id_rsa.
I then had to generate an id_rsa.pem file.
openssl rsa -outform PEM -in ~/.ssh/id_rsa -out id_rsa.pem
Copy the content of the id_rsa.pem file, and use that string as the value for the RSA_PRIVATE_KEY key for your Heroku environment variable.
Steps:
- Deploy a Staticman instance on your Heroku account.
- Add the personal access token as the
GITHUB_TOKENenvironment variable value. - Generate a public/private RSA key pair.
- Use the
id_rsa.pemstring as theRSA_PRIVATE_KEYenvironment variable value.
Invite your Staticman bot as a collaborator
What we need to do now is to give your Staticman bot access to your frontend repository. First, you need to add your newly created Github account as a collaborator to your Github frontend repository.
You can invite your new Github account as a collaborator by pressing the invite a collaborator found at settings -> manage access of your repository. Press the "Invite a collaborator" button, search for your new Github account (for example oalsing-bot), and add it as a collaborator.
Accept the collaboration invite
Now we need to accept the invite. Let's do so using the Staticman API on your Heroku server. After you've sent the collaborator invite, hit the following route in your browser.
https://:your_heroku_app_url/v2/connect/:your_github_username/:your_frontend_repository_name
To find the heroku_app_url for your application, go to your Heroku application and press the open app button in the top-right corner. For example, my heroku_app_url is https://blog-comments-staticman.herokuapp.com/.
You should now see a success message in your browser. If you're seeing Invitation not found, you probably haven't invited your Github bot account as a collaborator.
Create a Staticman configuration
Your backend service is up and running, and you have a Github bot account that will take care of commits and pull requests for new comments. The next step is to create the Staticman configuration file.
As mentioned earlier, the configuration file should be hosted in the root directory of your frontend repository in the staticman.yml file.
When Staticman receives a POST request, it will use its collaborator access to your repository to read the configuration file and process the requests using the configuration from the configuration file.
You can use my staticman.yml file below, adjust it with your personal preferences, and push it to your master branch.
staticman.yml
# Name of the property. You can have multiple properties with completely
# different config blocks for different sections of your site.
# For example, you can have one property to handle comment submission and
# another one to handle posts.
comments:
  # (*) REQUIRED
  #
  # Names of the fields the form is allowed to submit. If a field that is
  # not here is part of the request, an error will be thrown.
  allowedFields: ["name", "email", "url", "message", "slug"]

  # (*) REQUIRED
  #
  # Name of the branch being used. Must match the one sent in the URL of the
  # request.
  branch: "master"

  # Text to use as the commit message or pull request title. Accepts placeholders.
  commitMessage: "Add Staticman data"

  # (*) REQUIRED
  #
  # Destination path (filename) for the data files. Accepts placeholders.
  filename: "{fields.slug}-entry{@timestamp}"

  # The format of the generated data files. Accepted values are "json", "yaml"
  # or "frontmatter"
  format: "yaml"

  # List of fields to be populated automatically by Staticman and included in
  # the data file. Keys are the name of the field. The value can be an object
  # with a `type` property, which configures the generated field, or any value
  # to be used directly (e.g. a string, number or array)
  generatedFields:
    date:
      type: date
      options:
        format: "iso8601"

  # Whether entries need to be approved before they are published to the main
  # branch. If set to `true`, a pull request will be created for your approval.
  # Otherwise, entries will be published to the main branch automatically.
  moderation: true

  # Name of the site. Used in notification emails.
  name: "oscaralsing.com"

  # Notification settings. When enabled, users can choose to receive notifications
  # via email when someone adds a reply or a new comment. This requires an account
  # with Mailgun, which you can get for free at http://mailgun.com.
  #notifications:
  # Enable notifications
  #enabled: true

  # (!) ENCRYPTED
  #
  # Mailgun API key
  #apiKey: "1q2w3e4r"

  # (!) ENCRYPTED
  #
  # Mailgun domain (encrypted)
  #domain: "4r3e2w1q"

  # (*) REQUIRED
  #
  # Destination path (directory) for the data files. Accepts placeholders.
  path: "_data/comments"

  # Names of required fields. If any of these isn't in the request or is empty,
  # an error will be thrown.
  requiredFields: ["name", "email", "message", "slug"]

  # List of transformations to apply to any of the fields supplied. Keys are
  # the name of the field and values are possible transformation types.
  transforms:
    email: md5
Steps:
- Add the
staticman.ymlconfigurator file in the root folder of your frontend repository. - Push the configuration file to Github to make it accessible for your Staticman bot.
POST comments
It's time to POST a comment to our server, to see that our setup works correctly. Following the Staticman docs, you can use the following snippet to make a POST request to the server:
I rather make the POST request using Axios to get more control over loading states. To do so, you need to build the form data using URLSearchParams, as seen below.
var bodyFormData = new URLSearchParams();
bodyFormData.append("fields[name]", name);
bodyFormData.append("fields[slug]", slug);
bodyFormData.append("fields[email]", email);
bodyFormData.append("fields[message]", message);

axios({
  method: "POST",
  url: "https://:your_heroku_app_url/v2/entry/:your_github_username/:your_repository_name/master/comments",
  data: bodyFormData,
  headers: { "Content-Type": "application/x-www-form-urlencoded" },
})
  .then(function () {
    setLoading(false);
    resetInputData();
    setConfirmationMessage(
      "Thanks! Your comment will be published after it has been reviewed."
    );
  })
  .catch(function () {
    setLoading(false);
    setConfirmationMessage(`An error occured when posting your comment`);
  });
Hopefully, Staticman accepted your POST request and created a pull request with your comment. If not, I invite you to read the response from the Staticman server to debug what went haywire.
Steps:
- Make a POST request to your Staticman server.
- [Optional] Use Axios to make your POST request.
Display comments
In the staticman.yml configuration file, we specified that comments should be stored in the _data/comments folder. We also specified that the required fields for the POST request are the following: ['name', 'email', 'message', 'slug']. As of this, the comment entries created in the _data/comments folder will have the following format:
_id: dd0bc960-b226-11ea-b3da-87f84b3a5bd4
slug: resolving-celery-received-unregistered-task-of-type-error
name: Oscar Alsing
email: :email_hash
message: "Lorem ipsum dolor sit amet, consectetur adipiscing elit, sed do eiusmod tempor incididunt ut labore et dolore magna aliqua. Ut enim ad minim veniam."
date: "2020-06-17T13:09:27.029Z"
We have the name, the encrypted email, the message, the date, and the slug. When displaying our comments on the blog post page, we will make use of the slug field to connect blog posts with their corresponding comments.
First of all, we need to add the _data/comments folder to our internal GraphQL API using gatsby-source-filesystem and gatsby-transformer-yaml.
gatsby-config.yml
'gatsby-transformer-yaml',
{
  resolve: 'gatsby-source-filesystem',
  options: {
    path: `${__dirname}/_data/comments`,
    name: 'comments',
  },
},
Now, you should be able to query allCommentsYaml in the GraphiQL Explorer (http://localhost:8000/___graphql).
To query comments for a specific blog post, all you need to do is to filter on the slug. During the generation of my blog post pages, I use the following GraphQL query to filter on the slug of the blog post.
src/templates/BlogPost.tsx
comments: allCommentsYaml(filter: { slug: { eq: $slug } }) {
    edges {
      node {
        id
        slug
        name
        date
        message
      }
    }
  }
Steps:
- Add
gatsby-transformer-yamlandgatsby-source-filesystemtogatsby-config.yml. - Query comments for a specific
slugin your template.
Wrapping up
Hopefully, this article could guide you in the right direction, and you should now have a functioning comments section on your website.
I was impressed by how smooth the Staticman integration was, and I'm happy to have a comment section on my site that respects the user's data and follows the JAMStack principles.
If you have any questions, feel free to contact me, or post a comment.
Have a nice day 🙂